Understanding View Layout in UIKit
Recommended read first:
In the first post in this series, we discussed how to size and position an individual view and how to build up a view hierarchy by composing superview/subview relationships. But getting our hierarchy arranged the way we want with just the properties described so far would be tedious to maintain and prone to small math mistakes. Now it’s time to explore how to get that view hierarchy to look the way you want in a structured and scalable manner.
Layout is much too large a topic to cover in one post, so consider this the first in a sub-series of posts on layout. We’ll start by introducing some simple abstractions in this post to simplify how we specify the size and positions of our views, then we’ll start building abstraction layers on top of those simple abstractions to make common layout patterns even simpler.
One thing to keep in mind is there are many ways of achieving the same visual end result. There’s no one “right” answer, but which approach will serve you best for any given situation often depends on how you plan to implement things like interactions, animations, and accessibility on top of your layout (each of which we’ll dive into in later posts in this series). For now we’ll focus on the visuals to keep things simple, but remember as we discuss different approaches to the same problems, the choice of which to use will often become clearer as we take a step back and look at the larger picture of our UI.
Some Basic Types
Before we talk about how layout works, let’s review some of the basic geometry types we’ll be using. So far we’ve brought up a few Core Graphics types used for defining various view and layer properties:
- A
CGPointrepresents a point in two-dimensional space, as defined by itsxandycoordinates.

- A
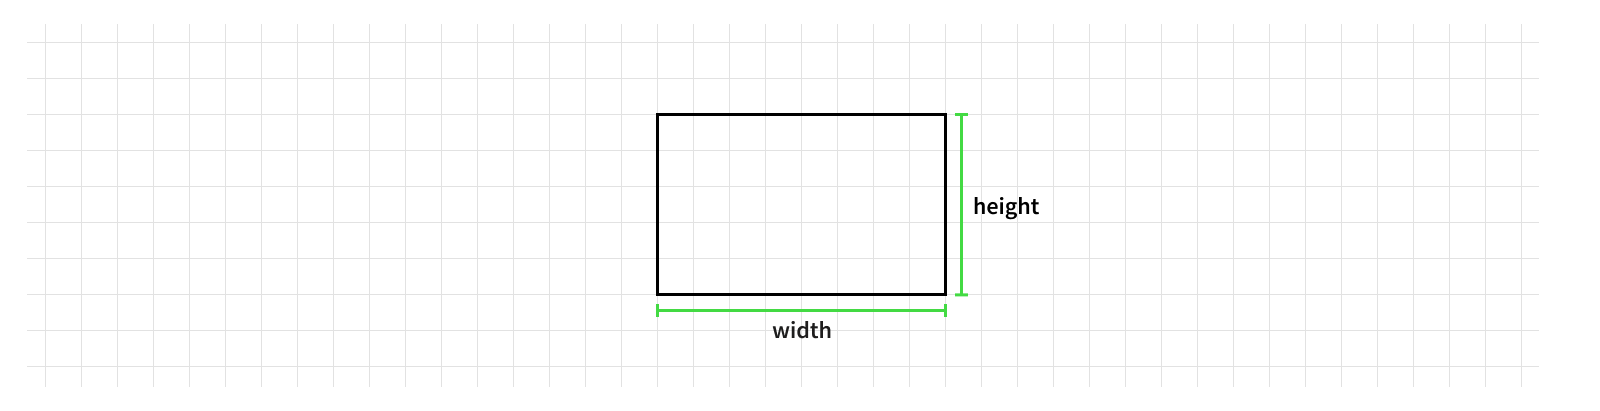
CGSizerepresents a size in two-dimensional space, as defined by itswidthandheight.
- A
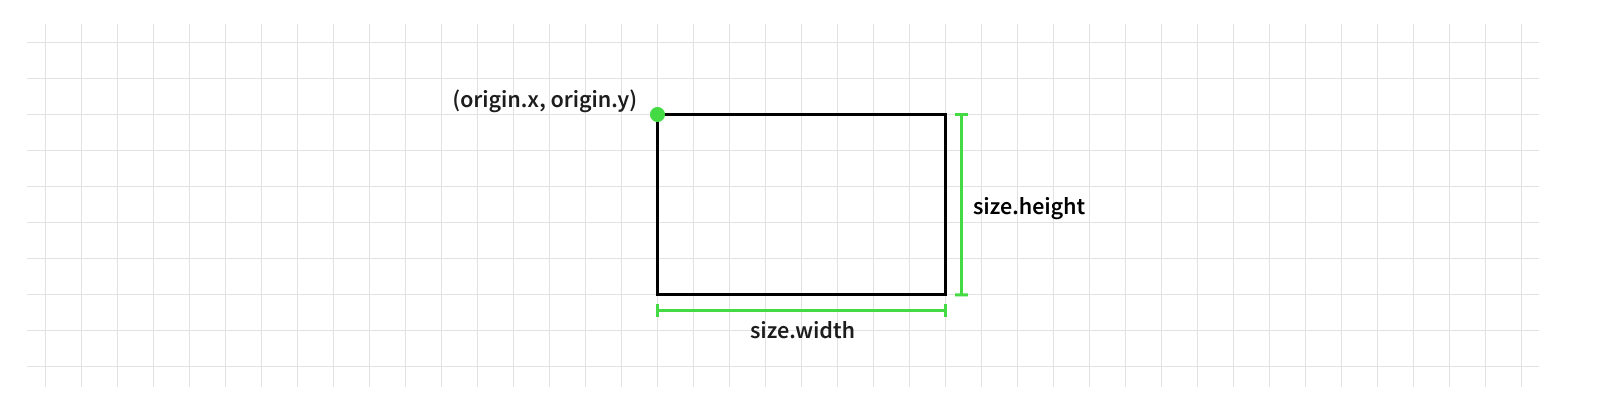
CGRectrepresents a rectangle in two-dimensional space, as defined by itsorigin(top left corner) andsize.
These geometry types, along with a few others, will be used throughout our layout code, so it’s important to have a good mental model of what they represent.
One key thing to keep in mind is points (and by extension rects) are only meaningful in a certain coordinate space. We need to ensure we use consistent coordinate spaces in our calculations. Mixing coordinates spaces is a common source of bugs, as sometimes the calculations will happen to work (say, for example, using a subview’s coordinate space when its positioned at the top left corner of its superview, such that their coordinate spaces are aligned), but leads to brittle code that can easily break down the line.
The Methods of Layout
In the first post in this series, we discussed the two main components in controlling our view’s location within its superview’s coordinate space: its size and position. There are two primary methods on UIView we will override to calculate and set these values.
The first is sizeThatFits(_:). This is where a view can vend (typically to its superview) what its ideal size would be within a given available space.
The second is layoutSubviews(). This is where a view performs its layout and assigns the new size and position values for its subviews (and sublayers, when using non-view-owned layers directly).
final class MyView: UIView {

    override func sizeThatFits(_ size: CGSize) -> CGSize {
        // Calculate our ideal size within the available `size`.
        return .zero
    }

    override func layoutSubviews() {
        // Arrange the layout of our subviews within the `bounds`.
    }

}
These two methods alone provide sufficient hooks into the layout system to build out even a fairly complex UI.
UIView’s default implementation of sizeThatFits(_:) will return the view’s current size. This is rarely the behavior we want, so typically views will want to override this method with their own implementation returning a large enough size to fit all of their content.
Note some views may not need to implement the sizeThatFits(_:) method. Since sizeThatFits(_:) is used to get a view’s ideal size, and the parent view isn’t required to respect that ideal size, in some cases it can be omitted when the parent will always get the size from somewhere else. For example, when a view is always intended to be shown in full screen, the size of the view will come from the size of the window, so there’s no need for it to calculate its own ideal size.
Most of the time, though, you’ll want to provide a sizeThatFits() implementation for your views. We’ll discuss how this works in a bit. For now, let’s talk about the other primary method in view layout: layoutSubviews().
The system will call layoutSubviews() on a view when its layout needs to be updated. As the name suggests, this is where the layout actually happens.
You should never call layoutSubviews() directly. Instead, you can tell the system a view requires another layout pass (also known as “invalidating” the view’s layout) by calling setNeedsLayout(). It’s important to call this when changing a value used in your layout code. A common pattern for implementing this is to add a didSet to the properties of your view used in its layout.
var someValueUsedInLayout: CGFloat {
    didSet {
        if someValueUsedInLayout != oldValue {
            setNeedsLayout()
        }
    }
}
Note setNeedsLayout() is only called here when the value has changed (when it’s different than the oldValue). While it’s important to invalidate the layout whenever one of the values used in layoutSubviews() changes, you should also avoid unnecessarily invalidating a view’s layout, since having to perform layout on too many views can cause performance issues - in this case, taking too long to complete layout could cause a commit hitch, which delays your UI from being rendered to the screen1.
Many of the built-in properties on a view, like it’s bounds, will automatically invalidate the view’s layout when they’re modified, so there’s no need to call setNeedsLayout() for these. And adding or removing views from the hierarchy will invalidate the layout as well. For this reason, in cases where you’re temporarily hiding a view without changing the layout, it’s often better to change its visibility using its isHidden property, rather than removing it from the view hierarchy, to avoid unnecessary layout passes. Where possible, it’s generally best to add your subviews early (such as in your view’s init) and keep the hierarchy consistent, using the subviews’ visibility to control their inclusion in layout rather than mutating the view hierarchy.
If you step through your code, you’ll find that calling setNeedsLayout() doesn’t immediately call through to the view’s layoutSubviews() method. Instead, it simply sets a flag on the view indicating its layout has been invalidated, which informs the system it should be included in the next layout pass. This is a huge performance advantage, since it lets the system batch many changes into a single layout pass.
If you need to ensure that a view has an up-to-date layout, you can call its layoutIfNeeded() method. If the view’s layout has been invalidated, the system will immediately call its layoutSubviews() method. That said, it’s best to avoid relying on a view having an up-to-date layout at any given moment, rather relying on it having an eventually correct layout and letting the system control the timing to ensure the layout is correct before the layers are drawn to the screen. However, there are times when it’s necessary to force the layout pass to happen immediately, so this is a valuable tool to keep in mind.
While the actual implementation is likely more complicated than this, you can think about these two methods as simply checking and updating a private property that tracks whether the view needs another layout pass.
private var needsLayout: Bool = false

public func setNeedsLayout() {
    needsLayout = true
}

public func layoutIfNeeded() {
    if needsLayout {
        needsLayout = false
        layoutSubviews()
    }
}
It’s important to avoid invalidating the layout during layoutSubviews(), since this could cause an infinite layout loop. For example, you shouldn’t add or remove subviews in layoutSubviews() since modifying the view hierarchy invalidates layout.
It’s time to write some layout code! Let’s start with something very simple: a single subview that takes up the entire space of its parent.
The quick and dirty rule when you’re dealing with a simplified layout case is to use a view’s bounds when looking up and its frame when looking down. In other words, you position a view within its superview’s bounds and you position a view’s subviews by their frames. This keeps you working in the same coordinate space, since the bounds refers to a view’s size and location in its own coordinate space while its subviews’ frames refer to their size and position in that same coordinate space, their superview’s.
With that, we can easily write a layout method that has a subview taking up the entire space of its parent. Simply set our subview’s frame equal to our view’s bounds.
override func layoutSubviews() {
    // Set `someView` to fill our entire `bounds`.
    someSubview.frame = bounds
}
Of course, our subviews won’t all be the same size as their parent view.
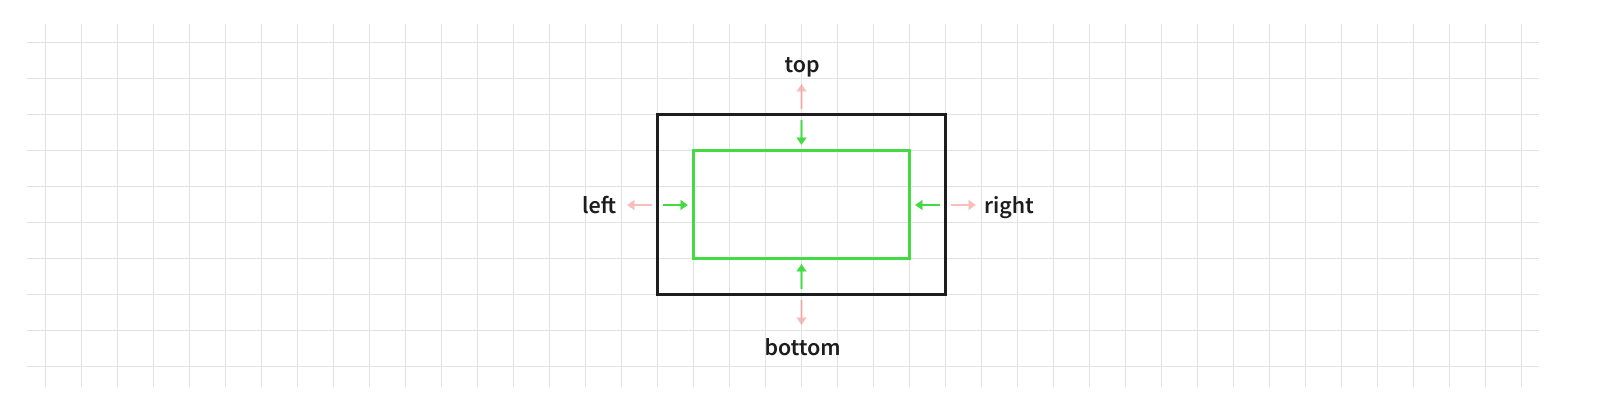
One of the simplest ways to adjust a rectangle is by insetting its edges. UIKit provides a UIEdgeInsets type that lets you define how much each edge of the rectangle (its top, left, bottom, and right edges) should be inset. A positive value insets that edge (shrinks the rectangle), while a negative value outsets the edge (expands the rectangle).
Let’s inset our subview from the edges of our view by 10 pt on the top and bottom and 24 pt on the left and right.
override func layoutSubviews() {
    someSubview.frame = bounds.inset(by: UIEdgeInsets(top: 10, left: 24, bottom: 10, right: 24))
}
Easy peasy!
As we learned in The Foundational Building Blocks of iOS UI though, there are some situations where a view’s frame is undefined. If you know the view will never be transformed (for example, if it’s inside a private class), then it might be okay to take this shortcut. In general, however, it’s best to use views’ bounds and center for layout instead.
Bringing In Some Help
The concepts we’ll be discussing in this post and the upcoming posts in this series will help you write flexible, adaptive layout code that will allow your UI to handle even the toughest situations. While all of the concepts can be executed by setting the basic view and layer properties we’ve discussed already, the code can get quite verbose to do properly everywhere.
To continue building on these concepts, while also making the complexity manageable, it can be very helpful to build abstraction layers on top of the basic concepts. We’ll be using an open source framework called Paralayout that provides utilities to simplify the code for much of the basic layout logic in UIKit, so we can focus on more complex topics. In particular we’ll be using a fork of Paralayout I maintain, which has some significant API improvements from the upstream library.
Whether or not you choose to use Paralayout or a different layout framework in your projects is up to you. Or part of Paralayout - the framework provides a variety of abstractions that build upon one another, so for your codebase you can choose to adopt the abstractions you find helpful and ignore the ones you’d prefer do differently. In any case, the important thing to take away from these posts are the concepts behind view layout; and those concepts are the same regardless of which framework you use.
The first property we’ll utilize from Paralayout is one to make setting the bounds and center easy without the overhead of frame’s undefined behavior: untransformedFrame. As the name suggests, this property acts that same as frame except we can interact with it independently of any transform on the view.
Sizing Views
The first thing to think about when writing layout code is how the views should be sized. Views are sized by their superview during layout, but each view also has the opportunity to guide its parent in how it would like to be sized. Views can override the sizeThatFits(_:) method to return the ideal size in which their current content can fit given the specified available space.
Your sizeThatFits(_:) implementation should never modify anything in the view2. It should simply calculate the ideal size for its content and return that value3, without actually changing its own size or the size of any of its subviews. sizeThatFits(_:) may be called multiple times throughout the layout pass, sometimes with different available sizes, so it’s best to avoid making any assumptions about what the method being called with a specific value means.
Since a view’s ideal size often depends on its content, it’s important that the content, along with any other configuration options, are updated before calling sizeThatFits(_:). For example, an image view’s ideal size is based on its current image, and it will also behave differently based on its contentMode. If you change either of these properties after calling sizeThatFits(_:), the previous size you got back may not be the ideal size any more.
One common pitfall in writing an implementation for sizeThatFits(_:) is checking a subview’s current size. The view may not have had a layout pass yet, or, even worse, may have had a previous layout pass at a different size, so it isn’t safe to assume your subviews have already been sized.
Let’s take a look at an example where we have two views stacked vertically with a small margin between them.
override func sizeThatFits(_ size: CGSize) -> CGSize {
    // Our size is the height of our children combined, with a margin in between, with the width
    // of whichever is larger. THIS IS BAD!
    return CGSize(
        width: max(firstSubview.bounds.width, secondSubview.bounds.width),
        height: firstSubview.bounds.height + someSpacing + secondSubview.bounds.height
    )
}
In this implementation we’re making the mistake of using the subviews’ current size to determine our ideal size. Instead, our sizeThatFits(_:) implementation should often call our subviews’ sizeThatFits(_:) methods to get their ideal size, then aggregate those sizes as appropriate for the layout (in this case a sum of the heights and a max of the widths).
override func sizeThatFits(_ size: CGSize) -> CGSize {
    // Our size is the ideal height of our children combined, with a margin in between, with the
    // width of whichever's ideal width is larger.
    let firstSubviewSize = firstSubview.sizeThatFits(size)
    let secondSubviewSize = secondSubview.sizeThatFits(size)
    return CGSize(
        width: max(firstSubviewSize.width, secondSubviewSize.width),
        height: firstSubviewSize.height + someSpacing + secondSubviewSize.height
    )
}
There’s one more thing to consider though. Think about this: the available space for each subview isn’t necessarily the same as the available space for the parent view. In some cases, where views are stacked on top of each other on the Z axis, the available two-dimensional space may be the same. But in the case of our example, the subviews need to share the available space to avoid overlapping.
There’s no one right answer how to handle this. It’s up to you which subview(s) should take precedence and what the rules are for how the space is shared. This is often a combination of deciding how the views should visually adjust to constrained spaces and deciding which view is more important from an informational perspective.
In our example, since sizeThatFits(_:) is returning the ideal size, it might be reasonable to say it really needs to have the combined ideal heights of its subviews and leave this implementation as-is, requiring the superview to place the view in a scroll view to allow the height to grow. Of course, this makes an assumption the width is the constrained dimension and the height is flexible. If the parent were going to place the view in a vertical scroll view though, the typical convention (though by no means a strict requirement) would be to pass an available size with the height of .greatestFiniteMagnitude to indicate that dimension is effectively unconstrained.
There’s no one right way to handle this. It’s up to you how your view should adapt to a different sizes. For this example, let’s say the firstSubview is more important, so we always want it to show its full content, and the secondSubview should fit inside whatever space is remaining.
override func sizeThatFits(_ size: CGSize) -> CGSize {
    // The first subview can take up as much space as it needs.
    let firstSubviewSize = firstSubview.sizeThatFits(size)

    // The second subview can take up as much horizontal space as it needs, but is constricted
    // vertically to the remaining space beneath the first subview, including the margin between
    // the two views.
    let secondSubviewSize = secondSubview.sizeThatFits(
        CGSize(
            width: size.width,
            height: size.height - firstSubviewSize.height - someSpacing
        )
    )

    // Our size is the ideal height of our children combined, with a margin in between, with the
    // width of whichever's ideal width is larger.
    return CGSize(
        width: max(firstSubviewSize.width, secondSubviewSize.width),
        height: firstSubviewSize.height + someSpacing + secondSubviewSize.height
    )
}
By reducing the available size passed to the second subview to only the remaining available space, we give it a more accurate indication of how much space it can actually take up while still allowing the parent view to fit in the available space given to it.
But what happens if a view’s content can’t fit in the available space? It’s acceptable for sizeThatFits(_:) to return a size larger than the available size if it has too much content to fit. It’s a view’s way of saying “Sorry, can’t do that. I need at least this much space.” It’s then up to the parent view to decide how to handle that response.
Beyond checking the ideal size of its children within its sizeThatFits(_:) implementation, views can also call their subviews’ sizeThatFits(_:) methods when performing layout in layoutSubviews() to determine what size to set each subview’s bounds to. The view isn’t required to respect the ideal size of each of its subviews, but under most circumstances views will take that ideal size into account, often setting it directly.
In fact, UIKit defines a convenience method named sizeToFit() to do exactly this. Calling a view’s sizeToFit() method will call through to its sizeThatFits(_:) method and set the result as its size.
These methods are very similarly named, but it’s important to keep them straight to avoid having unintended side effects. Since calling a method is a form of communication between two objects, you can think about these two methods as using two different types of communication. Calling sizeThatFits(_:) is asking a question - you want to know what size is preferred. It’s asking “what is your size that fits this space?” Calling sizeToFit() is giving a command - you want the subview to update its size. It’s saying “size yourself to fit in this space.”
Calling sizeToFit() works well when a view’s size that fits depends solely on its internal content, but is quite limiting since it doesn’t allow for passing in the size of the available space. Since you’ll usually want to size your subviews within the available space, it’s generally better to call sizeThatFits(_:) directly.
That said, you don’t need to set the result of sizeThatFits(_:) immediately. There’s no requirement that a view must be at its ideal size. Its parent can assign any arbitrary size, sometimes without even calling sizeThatFits(_:) at all. A common pattern is for the parent to call its subview’s sizeThatFits(_:) method, but constrain the view to fit within the available size, even if that means its content won’t fit entirely.
override func layoutSubviews() {
    let subviewSizeThatFits = someSubview.sizeThatFits(bounds.size)
    someSubview.bounds.size = CGSize(
        width: min(subviewSizeThatFits.width, bounds.width),
        height: min(subviewSizeThatFits.height, bounds.height)
    )

    // ...
}
Note that to ensure the size of the bounds is the maximum size for the subview, we need to take the minimum of the subview’s ideal size and the size of the bounds. This can get a bit confusing, so be careful when writing or reviewing this sort of logic.
Paralayout defines conveniences for calling the sizing methods with these constraints. It also provides variants of sizeToFit() that take the available size as a parameter. For the example above, Paralayout enables the code above to be simplified down to:
override func layoutSubviews() {
    someSubview.sizeToFit(bounds.size, constraints: .maxSize)

    // ...
}
The SizingConstraints passed in is an option set that includes min and max constraints for both the width and height. The .maxSize constraint used here is a combination of .maxWidth and .maxHeight, meaning the bounds.size should be the maximum value for both dimensions. There are similar minimum variants of these constraints, and conveniences to have a fixed value in one or both dimensions by applying a min and max. This makes it easy to manipulate the values returned by sizeThatFits(_:) to fulfill whatever layout your view requires.
Paralayout’s sizing method also enforces a minimum value of zero in each dimension. If setting sizes manually, it’s important to keep in mind setting sizes with negative values can have unexpected consequences, as we learned about in the first post in this series.
By using sizeThatFits(_:) and the conveniences built on top of it, we’re able to size our subviews to meet the needs of the current view, while allowing them to influence their own size. There’s nothing unique about sizeThatFits(_:) when it comes to sizing though. It serves as a shared API for all views, and in the vast majority of cases it’s sufficient to guide the parent in sizing. But you can also vend alternate methods or properties for sizing if needed.
Aligning Views
After a view has been sized, it’s time to determine its position. It’s important the view is at its final size before you position it, though, since otherwise the position will be thrown off when you resize it.
As we learned earlier, you can control a view’s position by setting its center property. To keep things simple for now, we’ll assume all of our views’ anchor points are at their center, as is the default, but remember that in the real world we need to consider that a view’s center may not actually be at its center in all cases.
To position a view, we often talk about aligning two points. For example, to position a view in the center of its superview, we can align the center point of the view with the center point of its superview. Keep in mind the two views’ center properties are in different coordinate spaces though, so we can’t just set one value to equal the other.
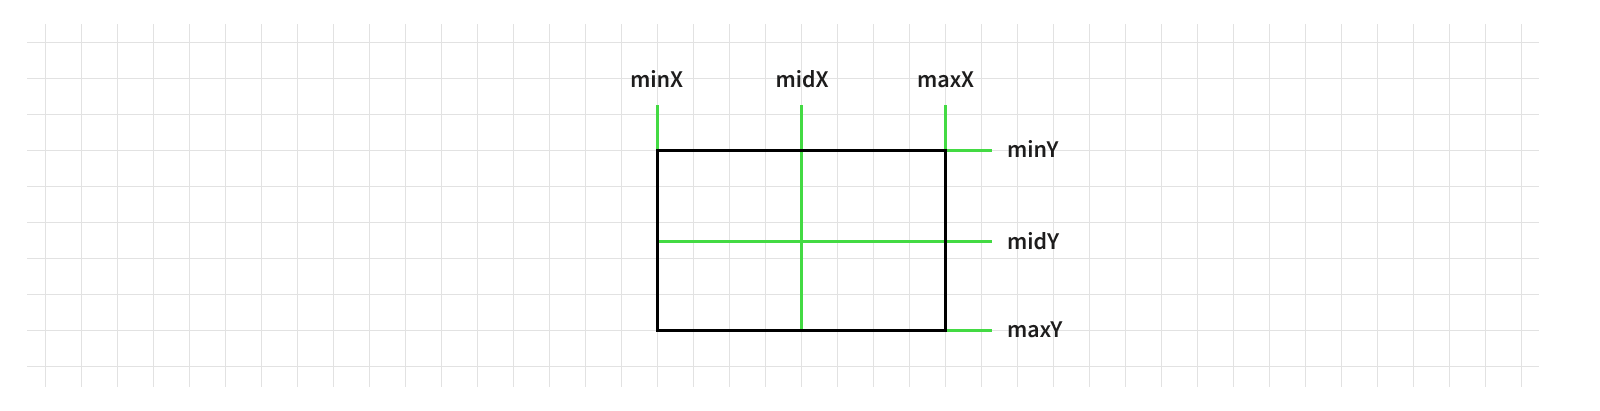
While we could calculate the center point of the superview’s bounds using its origin and size, there is an easier way. CGRect provides conveniences to get the min, mid, and max values for the rect along each axis. These take the form of properties on the rect named minX, midX, and maxX, along with the corresponding *Y equivalents4.
Using these values, we can align our view to a specific point in its superview. For example, to align our view’s center point to its superview’s center point, we can set its center to the point at its superview’s bound’s midX and midY:
// Center `someView` inside of the parent's `bounds`.
someView.center = CGPoint(x: bounds.midX, y: bounds.midY)
Of course, things get more complicated when we want to align via a point other than the center of our view. One way to accomplish this is by changing the view’s layer’s anchorPoint, but this isn’t ideal since it affects the way transforms look as well. Instead, we can offset the center by the distance to the point in the bounds we want to align to.
// Align `someView`'s top left corner to the top left corner of the parent's `bounds`.
someView.center = CGPoint(
    x: bounds.minX + someView.bounds.width / 2,
    y: bounds.minY + someView.bounds.height / 2
)
Again we’ll use an abstraction from Paralayout to simplify this sort of alignment, since Paralayout’s alignment methods handle the math for us. For example, aligning the view’s top left corner to its parent’s top left corner can be simplified down to:
someView.align(.topLeft, withSuperviewPosition: .topLeft)
Importantly, alignment in Paralayout uses the view’s bounds and center (and its layer’s anchorPoint), not its frame, so the layout ignores any transformations applied to the view. This allows us to use the view’s transform (including non-centered anchor points) to add animations and other interesting visual polish without adding unnecessary complexity to the layout logic. We’ll see some examples of this later on.
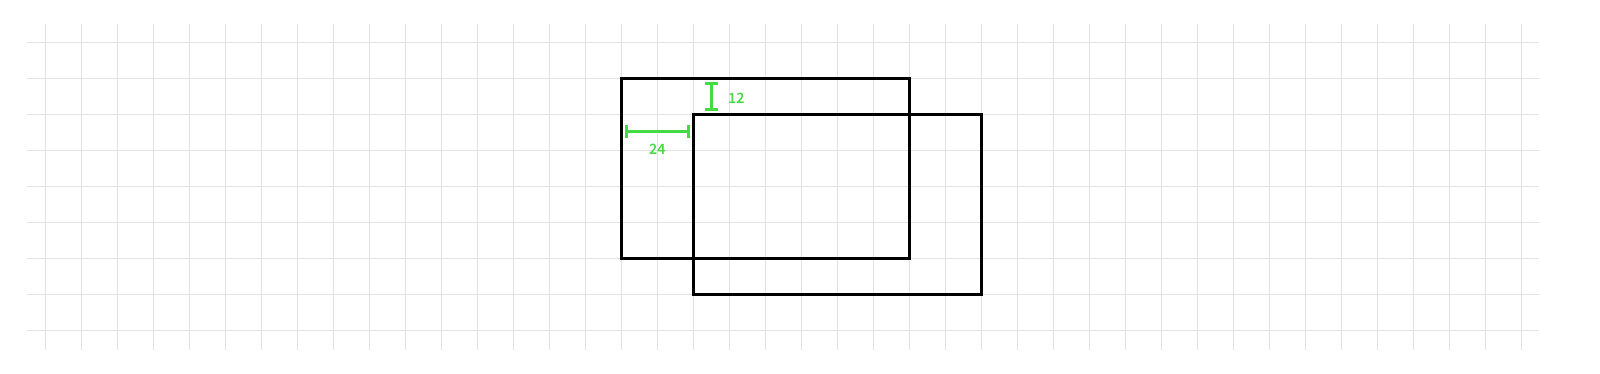
This example is only the start of the power of alignment though. We often don’t want to align two points exactly, but rather have some space between them. For example, say we want to align the top left corner of a view with the top left corner of its superview, inset 12 points from the top edge and 24 points from the left edge.
UIKit has a type to represent exactly this: a UIOffset. The offset between two points is measured in two dimensions: a horizontal value, its offset along the X axis, and a vertical value, its offset along the Y axis. Remember since iOS uses a flipped coordinate space, a positive vertical offset moves the point down and a negative vertical offset moves the point up.

We can apply the offset to our alignment by adding these values to the subview’s center.
// Align `someView`'s top left corner to the top left corner of the parent's `bounds` offset
// by the `offset`.
someView.center = CGPoint(
    x: bounds.minX + someView.bounds.width / 2 + offset.horizontal,
    y: bounds.minY + someView.bounds.height / 2 + offset.vertical
)
Paralayout’s alignment methods also accept offsets.
someView.align(.topLeft, withSuperviewPosition: .topLeft, offset: offset)
So far all of our examples have aligned a subview to a position in their superview. But often we want to align a subview relative to one of its siblings, rather than its parent. The same logic applies, but instead of using our view’s bounds, we need to look at each subview’s bounds and center.
// Align `someView`'s left center to `anotherView`'s right center.
someView.center = CGPoint(
    x: anotherView.center.x + (anotherView.bounds.width / 2) + (someView.bounds.width / 2),
    y: anotherView.center.y
)
Or using Paralayout, this becomes:
someView.align(.leftCenter, with: anotherView, .rightCenter)
Remember earlier we said how it’s important to size your view before aligning it, since the alignment code is dependent on the view’s current size being correct. Similarly, aligning to another view adds a dependency on that view’s size and position. It’s important to only align to another view that has already been sized and positioned, since otherwise you’ll be aligning to an outdated point. We’ll talk more about organizing your layout code around these dependencies shortly.
The left-/right-based positions we’re using here (such as
.leftCenterand.rightCenterin the example above) are conceptually the most similar to the math-based approach, however once you expand your app to support right-to-left localizations, you’ll want to switch over to leading-/trailing-based positions. We’ll cover user interface directions much later in this series, since there’s a lot of hidden complexity in support both LTR and RTL interfaces, but we’ll prefer leading-/trailing-based positions where the behavior is the same.
There’s one final consideration when aligning views: pixel snapping. Similar to how we adjusted our layers’ border widths to the nearest pixel, we can do the same with our views to ensure they have crisp edges. The same logic we used for the border widths (based on the screen scale) will work for this as well. Paralayout’s alignment methods take the screen scale into account and automatically round values to the nearest pixel.
Views that aren’t pixel aligned don’t look obviously wrong. In fact, you’ve probably seen many non-pixel-aligned views in apps you use every day. But pixel alignment is a tool to help add that little extra bit of polish. It’s like when you think your vision is fine, but you go into your optometrist for a check up and they have you look through the phoropter and tell you “actually, things could be a bit sharper.” Pixel snapping isn’t strictly necessary, but when you’re striving for a very polished UI, it’s a great technique to employ.
-
There’s a great WWDC video about detecting and debugging commit hitches. ↩
-
Or at least anything that affects the layout of the view. Sometimes you want to cache values that are expensive to calculate, so updating the cache is
sizeThatFits(_:)is completely reasonable. Just avoid invaliding the view’s layout. ↩ -
We’ve previously discussed how pixel rounding can ensure you get a sharp edge on your view when you have a solid boundary such as a border, and below we’ll discuss how to position our views so they’re aligned on pixel boundaries. But these only cover two edges. To get the other two edges sharp, it’s also important to round your view’s ideal size in pixel increments. You can do this in Paralayout by calling
ceiledToPixel(in:)(or the round/floor variants) on your size before you return it fromsizeThatFits(_:). ↩ -
In Swift these are properties. In Objective-C, they instead take the form of functions named
CGRectGetMinX,CGRectGetMidX, and so on. This is a common pattern you’ll see for how functions originally written in Objective-C were ported over to Swift. We’ll typically refer to the Swift definitions throughout this series. ↩